Week 61

Clinton celebrated a penultimately significant birthday on the weekend by going back to school: blacksmithing school. He’s always happiest when he’s making and building and doing. So with some stout shoes and safety glasses, off he went to the Quinnells’ at Fire and Iron to get stuck in to Make Stuff.  The course was about blacksmithing technique but with an artist kind of vibe; the goal was to take home a few cool pieces at the end of the two days. With a little guidance from the instructors, he’s gone and made something quite amazing, unique and special. You’ll have to wait for the great unveiling in a future post, but I will hint that it’s for the house.

house 10.06.2017 - 6.jpg
Iron Man

The long-awaited visit from British Telecom to attach the house to the rest of the planet was scheduled for Monday. Matt the Engineer arrived promptly first thing to rig up the line. Jamie got stuck in to finish off the trench, and James and I deciphered where the electricians had cunningly hidden the location for the BT box (spoiler: in the garage). So Matt got busy connecting, and Jamie filled in the trench afterwards. Apparently there’s a dial tone and everything!

house 10.06.2017 - 1.jpg
we love a good trench

Other outdoor work included laying more paving slabs and turning on the outdoor lights.

house 10.06.2017 - 15.jpg

house 10.06.2017 - 16.jpg
replacing a wobbly slab

Steve’s team came to install the wood burner in the middle of the week. Cue much amusement from the guys wanting to know when the fish will be delivered. Installation went off mostly without a hitch with a little drilling out of the brickwork for ducting and a little bricking up for a base that the thing sits upon. It’s a closed system, so we don’t need air bricks to the room, but there is a need to supply air to the appliance itself, and another need to vent out the chamber so it doesn’t overheat, especially since we’re sticking a great big TV above it (eventually). The extra size of the exterior brickwork plinth at the bottom made it a little challenging for the guys to connect the bottom duct since it was so long, so they had to come back the day after and finish the job. It looks great as it is but we’ll add to it in time: eventually the build-out sections will be built bigger so the TV is set back behind the stove. We’re going to develop this design with Steve now that this portion of the job is complete, but at least it’s safe at the moment and passes all its HETAS requirements for building control. It’s a complicated design, but Dave’s watching over it, and it will be awesome.

house 10.06.2017 - 2.jpg
Rais 900 all alone
house 10.06.2017 - 3.jpg
where it will live
house 10.06.2017 - 23.jpg
woodburner, mid-install
house 10.06.2017 - 7.jpg
temporary buildout and ready to go

The mechanical ventilation system failed it’s commission a couple of weeks ago, which was slightly scary. The pipes are all running in the void between the concrete first floor and the ground floor ceiling, and getting to them now would destroy a ton of decorating. The system runs to all the wet areas including the downstairs coats cupboard where all the electrical controls are housed. The problem was that there wasn’t enough suction on the longer runs to the other side of the house and to the kitchen, so it failed its installation tests. We have been waiting on tenterhooks seeing how the company would deal with this, and they came back this week to fix it. Their solution was to fit a second motor in the loft to give it enough oomph. So now we’ve got double-spiders up there, all labelled up nice and pretty, and it sucks like fury. Hooray!

house 10.06.2017 - 4.jpg
fancy MEV

You may have noticed in one of the photos above that the exterior light was ON! Yes, the lights are on at long last. Lewis was characteristically sanguine about showing me the gleaming little LEDs and lovely warm Edisons outside, but I am pretty sure he’s kinda proud of getting near the end, and I think I even caught a sly smile or two in there somewhere. It’s another threshold of making the house look like a home.

I’ll take you on a tour of some of the mostly-finished rooms….

house 10.06.2017 - 8.jpg
shoes-off policy upstairs now that the floor protection is up
house 10.06.2017 - 9.jpg
Gareth’s room
house 10.06.2017 - 10.jpg
Gregory’s room
house 10.06.2017 - 12.jpg
first floor hallway
house 10.06.2017 - 13.jpg
the glorious linen cupboard!
house 10.06.2017 - 14.jpg
Gillian’s room
house 10.06.2017 - 17.jpg
up close and personal with a newel post
house 10.06.2017 - 18.jpg
boys’ bathroom with burglar PIR in hallway
house 10.06.2017 - 11.jpg
master vanity needs shifting to the right 100 mm

It was all looking marvellous indeed! But then… the heavens opened. This time last year, you’ll remember that the storm drains on the local roads up the hill failed, and my neighbours got flooded out with the grounds guys altruistically running bricks to them to raise their furniture before the water got to their beds and sofas. Since then, much repair work has been done, and one neighbour was able to move back in just after Christmas; the other is due to move back in at the end of the summer.

This year it was our turn for drama.

The water was either down to the oak frame or the windows, and it was only in a few places. First we phoned Neil who has built a bijillion of oak frames in his career, and he was totally cool about it. Although he’s never seen anything like it, he offered some suggestions and kept a cool head. He was down onsite two days after we called, and he agreed to do some sealing around the edges as a failsafe. He came with Grant and an enormous ladder on the weekend to put the CT1 in some gaps and seal it up, so we won’t be seeing this sort of thing again. The next step is to talk to the window company about the seals around the windows, but that’s a little more complicated because there are so many materials (mastick, sealant, bronze frames) to contend with. Ben’s on it and we should come up with a solution to cover that side as well soon. This belt-and-braces approach should mean we’ve got an air and water tight arrangement, and this is important as we look forward to the all-important Air Test for the SAP calcs in a couple of weeks.

The brick guys returned to repair the damage we did to taking out the piers, and to fill the extra holes the in the bricks made by the electricians in their quest to find good spots for outdoor lights and power. They should finish up next week so they’re only here for a wee bit, but I didn’t get away lightly…. “Who was the last man to walk on the moon?”, asked Paul in the morning. With a completely blank mind, I said Charlie Duke whom I knew was an astronaut, but I also knew was the wrong answer. I’ve even read Andrew Smith’s Moon Dust, and I SHOULD know these things! When I came back onsite in the afternoon to drop off some thing or other, it was “What’s so significant about the River Roe in the States?” Galling, because I’m American, and I’m sure he picks these questions because of it. I will leave you to go and find the answers yourselves!

house 10.06.2017 - 5.jpg
chipping out the decimated brickwork
house 10.06.2017 - 1 (1).jpg
redoing their own work

And James has got all comfortable in his man-cave in the kitchen.

house 10.06.2017 - 1 (2).jpg


Week 58

Without going into too much drama about tempers flaring, lines of communication being tested, inspections on the edge and deadlines looming, …, despite all this, it’s all mostly going to plan. This week’s post will be mostly pictorial as I’m struggling to write anything at all coherent in the rush to finish this project. Loose ends include all electricals as we haven’t seen a blub a-flickerin’ yet, the entire fireplace concept, some of the big wood pieces from Neil, the sanitaryware, tiling and the drive. On the positive side, the Moldovian chippies Adrian and Vadim are generally fantastic and are busy getting on with doorframe, skirting and ironmongery. Terry and Josh finished the stairs too–I don’t think they’ll be in a hurry to fit any more capping in the hand and floor rails, but Josh remains undeterred, even when faced with a chisel in his hand and a trip to Epsom hospital. Didn’t stop him smiling when he returned to site to finish the day’s work.

The cornice company arrived early in the week and transformed some of the rooms.

house2017.05.23 - 9.jpg
awesome coving, but, oops, poor decision on light placement
house2017.05.23 - 10.jpg
does this work around the units?
house2017.05.23 - 1 (1).jpg
drawing room looking more formal

Finishing touches around the staircase are being decided with things like skirting beading, window/stair boards, and capping under the newels. James is great at making use of extra pieces to create some of the finishing touches. And it’s only when you see these things installed that you can get a feel for what the finished product looks like. Most things have been fantastic, and some require small tweaks, like the window board used on to top the plasterwork in the front bay. We’ve decided that the trim should have a profile more like the stairs, so this bit of boarding will be replaced, but it was excellent to have the flexibility and chance to check out the profile and have the option. This exercise prompted some deep thinking about what exactly we’re trying to do in the space.

house2017.05.23 - 1.jpg
is it a window board or a stair board?

Likewise with the trim between the structural oak and the floorboards. Initially, I wasn’t keen to have so many different kinds of oak hanging around, so I didn’t want the trim in at all when we started the finishes. And James’ advice was not to have too many different trims or the whole thing looks cluttered. But now I feel that if each piece does what it’s expected, then it follows the ethos of honest materials in the house, and it should be ok to have a little bit of trim that matches around the house, and it will blend in better in time. We opted for the little bead around the structural oak in the photo. The floors remain protected, and the windows will have a layer of dust on until the final sparkle-clean, so it’s hard to tell what the final finish will be anyway!

house2017.05.23 - 2.jpg
beading on the floor
house2017.05.23 - 5.jpg
under-newel

Vadim and Adrian have been boxing in pipework and building wardrobes around them. We’ve decided on a semi-complicated painting scheme with the interiors being darker shades of each room’s trim.

house2017.05.23 - 14.jpg
Gemma’s wardrobe
house2017.05.23 - 15.jpg
Gillian’s wardrobe
house2017.05.23 - 7.jpg
double checking the spec on ironmongery

Looking forward to snagging the kitchen next week. We’ll discuss a few trimming bits, and do a double check on things like the work-surface edge.

house2017.05.23 - 8.jpg
discussion piece: is this pencil or bevel?

The bathrooms are looking good, but we’re finding a few things that could have been better designed. Like,…. the door slamming into the unit when entering the bathroom. We’ll have to install a rubber baby buggy bumper on the back side of the door along with advice to tell the boys to be jolly careful without entering their bathroom with too much energy (shouldn’t be a problem, they’re a bit slow int he mornings). Much consultation with Allison in the States and friends in the UK to generate a survey of vanity unit heights in an attempt to get ours right. We’ve decided 900 to top of unit is a good height–a little higher than most, so it won’t be our family keeping the local chiropractors in business.

house2017.05.23 - 16.jpg
boys’ bathroom

In a dull moment, the guys found time to remove the plinth they’d lovingly installed before we changed our minds. Our MO seems to be build it, then remove it….

house2017.05.23 - 6.jpg
plinthless fire

…. just like the piers!

house2017.05.23 - 11.jpg
looks better now

house2017.05.23 - 12.jpg

Clinton never really liked the piers in the front; they were only put there to carry the rainwater downpipes into the ground in a clean swoop. So, taking advice from the architect and structural engineer who both said that they weren’t critical to the structure, we decided to take the bold (= expensive) move to remove them. This leaves an obvious problem for the bricklayers who now need to come back and make these areas pretty again. But the overhang looks much less fussy now, and we’re happy with it. At least we were until a giant gaping crack appeared around the first floor cavity trays.

house2017.05.23 - 18.jpg
omg

On further advice, we adopted a suck-it-and-see approach, and the whole thing looks pretty stable despite the crack. It hasn’t shifted since it first appeared, so should be ok. After all, there is an enormous great big steel holding up this side of the house, and the roof is all complete as one separate structure spread across the whole building. It SHOULD be ok. At least it is when I close my eyes. And a little mortar in the joint before we move in and all will be well. Right?

Lee, Jamie, Djokovich, and the groundwork gang were back to lay the paving for the patio. Their work was hampered by the water board inspector who deemed it fit to ask the guys to dig the main supply to the house a little deeper. This was an enormous pain which required un-building of the garage and some of the edging stones the guys had laid last week. The inspector didn’t stop there, took a deeper look at some of the work and started going off on other trench work depths, like the supply into the taps in the garden. He even had a go at some of the pipework internally, which never happens apparently. Usually the inspector has a cursory look around near where the water enters the building and leaves the M&E team to get on with things downstream. The groundwork guys have done hundreds of jobs like this without fuss, and the plumbing team was livid by the time the inspector finally passed it all, and all the trenchwork could be filled in. They’d none of them ever seen anything like it. Clearly this house has been jinxed from the start. The guy earned a few choice nicknames around site, and luckily for him some of the spare pieces of wood lying around didn’t get airborne.

house2017.05.23 - 1 (2).jpg

house2017.05.23 - 13.jpg
high water table in the mains trench
house2017.05.23 - 4.jpg
on the positive side, slabs are looking good

We’re even venturing into town to look at furniture and light fittings. Mostly these experiences highlight that fact that neither of us like shopping very much, nor do we like going into town unless it’s work related. We’re much more country-bumpkins these days. Either we’re super boring (likely), or we just dread the time it takes to travel around aimlessly looking at one low-profile uncomfortable sofa after another. I think Clinton was definitely going to lose the plot entirely if he got close to one more Edison bulb singeing his retinas.  The best way forward is to continue on our current course of clicking our way through doing most of the furnishings.

house2017.05.23 - 3.jpg
keeping the guys happy

Week 57

Deep breath. Another week. Lots happening onsite though. I’m thinking Pareto thoughts as we get into the last 20% and see lots and lots of little tiny things blossoming into Good Things and other parts turning into Snagging Things.

It’s all about stairs at the moment. The last newel came to site, and got chipped into the corner.

house2017.05.16 - 9.jpg
cut newel

And the last baluster went in with the weird expanding foamy glue.

house2017.05.16 - 17.jpg
ew
house2017.05.16 - 6.jpg
the balustrade, pre-balusters
house2017.05.16 - 10.jpg
empty handrail

Tony brought the long-awaited balusters to site on Tuesday. They looked a treat when he got them out of the van and laid them out carefully in the family room.

house2017.05.16 - 1.jpg
Tony and his balusters

He’s rightly proud of them and set them out with enough room between them so they didn’t touch each other. We anticipated a smooth installation, and Tony brought Dave along to help. But when everyone was onsite and we all tried to negotiate Tony’s metal work with Terry’s wood work, James quickly realised that because stairs are installed sequentially, our plan to add Metal and Wood in parallel wasn’t going to work. Tony usually operates as a discrete trade that doesn’t rely on anything else going on after his work is installed, so when we decided that to avoid a lot of standing around and waiting while wood and capping were placed in line after each baluster, we all decided it was best that Terry install the whole thing, and Tony left, a little disappointed.

house2017.05.16 - 2.jpg
the first one went in fine….
house2017.05.16 - 3.jpg
pointy-down on its rail

The pattern is kind of complicated and made more so by having mirrored patterns along primary newels while retaining a consistent direction for the pig-tails (what Josh calls them). One small bit of trouble bubbled up upon inspecting the holes cut for the pointy-ups and curlicues. They’d CNC’d into the treads at the joinery base, but they were rounded, too small, and bereft of further drilling into the stringers. The holes were short so the lengths that Tony cut perfectly to size couldn’t be fit. Another reason that Tony went home early from the party.

This was potentially a bigger problem than working out the process of labour in the installation. The holes are meant to be square to accommodate the metal sections, and drills are generally round, so straightforward drilling out wasn’t an option. Could chip them in with a chisel?  In order to get the chippings out of the hole and keep a square profile there’d be no way to get a chisel down in there at the right angle to do the work. Much chin scratching and tutting all morning. Luckily, the joinery company sent down a lucky victim later in the week with a portable mortice chisel machine to sort it all out, and once that was done, Terry and Josh could get fitting, working their way gradually around the balustrade.

house2017.05.16 - 4.jpg
too small and too roundish
house2017.05.16 - 12.jpg
balusters on rails

More chin scratching occurred when we realised that a couple of the rails pointed the curlicues in the wrong direction. But that was quickly sorted. Between Terry and Tony, it was only me that was panicking for no reason at all.

house2017.05.16 - 16.jpg
Terry flipped the pigtail by cutting the rail
house2017.05.16 - 24.jpg
balustrade looking more and more finished

house2017.05.16 - 21.jpg

house2017.05.16 - 22.jpg
did we have to go and make it this complicated?

Decorating continues on a pace. I read somewhere that when they’re midflow, it’s important to hold your nerve, make no changes, and see what the colour looks like when they’re done. I must admit to having to do just that at a few moments while Mike has had the brushes out. None of the colours are particularly contentious, all different shades of neutral. But I’m used to seeing all the walls in white, and some of the colours seem a bit, well, bold in large scale.

house2017.05.16 - 7.jpg
tower mid Potters Clay 2 and Potters Clay 3
house2017.05.16 - 11.jpg
Mike makes it look easy

The guys are putting in all the door handles as well. Graham has been very patient with our list of door furniture, and it’s incredible how many working parts and variations there are to doors. Bathrooms sets, locks, latches, flush bolts, roller catches, magnetic catches, exterior espag sets. And I still haven’t chosen a front door knob or a post box.

house2017.05.16 - 23.jpg

house2017.05.16 - 13.jpg
levers and latches

There is a lot of dippy stuff going on behind the scenes to do with bathroom fittings. The WC basin is a freestanding floor thing, and fitting it is giving the guys kittens just because it’s a little unusal. How far from the wall, madam? How high for the taps? It’s almost in, and the water is live. They still have to tile the back of the room before installing completely, and that will be next week sometime.

Another problem was bath valves. Valves are the things that turn the water on in plumber-lingo, and we’d planned to have them drilled into the bath. But of course what’s on the architect plans didn’t quite match up with the bathroom order that we placed last October, and the holes had gone off into the ether. The logical alternative was to fit them on part of the horizontal buildout from the bath to the wall.  And this looked alright until we remembered the vanity unit that would stand between the user and the dials. So I thought, let’s just cut to the chase: I recalled what Dan had said about controls when we started talking about bathroom gear in the first place, and I opted for a simple manual shower valve for the bath. Martin was as great about it as he’s been since he’d picked up our job after Dan had left the company, and he did a straight swap that included two drives to Farnham (mine) to return and collect.

I don’t have any photos of this gear, but it’s really simple. In fact, it’s so simple that Trevor and Dave on the M&E side said that it wouldn’t pass building regs. Apparently there’s a pesky TMV3 (?) regulation that these valves do indeed need to be thermostatic and not manual so little-‘uns doesn’t get scalded. This whole bath tap thing has been a very long and boring saga which has included me looking for options on the internet on my phone in tiny-vision in meetings and in the middle of the garden trying to make a decision about taps that would work.

So instead of photos of bath taps and Surrey countryside, here are some pictures of things happening around and about the build this week.

house2017.05.16 - 8.jpg
tools
house2017.05.16 - 18.jpg
ensuite tiles, pre-grout
house2017.05.16 - 5.jpg
lone pointy bits against beech
house2017.05.16 - 20.jpg
they moved the ceiling pendant in the hallway

If I haven’t mentioned Rachel before, I’m really happy to finally mention her now. She’s helping with the interior design part of the project, with goddess-like patience, and at the moment it’s all about blinds and curtains. My good friend Lou paid us a visit on Friday and kindly helped me out (read: got roped in…) to measure each and every one. We counted 36 windows that need separate coverings. And there’s a long lead time on these, and as we’ll be moving in around the summer solstice (we’re at 51 degrees latitude up here in the south of England, so it’s very light, very early), it’s good to put these in the important and slightly-urgent box. I’ve made a list of priorities for these. I think we’ll be open to the world for a while if only for cost! At least the lane isn’t exactly the M25 for traffic …. Cardboard is underrated as a window dressing anyway.

house2017.05.16 - 19.jpg
sample city


Week 56

The kitchen is in.

house2017.05.07LR-10.jpg

house2017.05.07LR-11.jpg

house2017.05.07LR-12.jpg

There are a few teething problems, but I’m sure it’s nothing that won’t be overcome in time. The most imperative thing that needs a little attention is the presence of the hole that’s been drilled for the ducting. James had organised a massive 7″ core drill to be onsite for the job, but the work that was carried out didn’t use that tool, so we’ve got a preliminary hole for the moment. This will have a lovely grille over the front of it in a couple of weeks, and eventually it will be covered by hydrangea or otherwise. But for now, we don’t want any little beasties crawling in and making a home before we do.

house2017.05.07ip - 1.jpg
hole and bits

Terry and Josh have been working hard on the stairs. There is an incredible amount of chipping, gluing, measuring and fitting involved. And inherently, there is a lot of up and down, up and down, so it must be tiring. The bottom steps were set into place and they look ever so graceful. We can actually use the stairs now, but they’re still covered up with protection, and I think James will keep the ladder up as long as possible to prevent boots from risking accidental chamfering off of the square nosings. It’s interesting to see the scaffolding morph into different positions as required during a working day.

The fiddly CNC’d secondary newel posts arrived as well, and Mike and Clive have covered them in a lovely coat of their favourite, Osmo. They look a bit lonely off the stairs, but they look great in the pdf files–can’t wait to see them go in.

house2017.05.07ip - 6.jpg
tool bed
house2017.05.07ip - 5.jpg
secondary newels
house2017.05.07ip - 4.jpg
not-quite-fitted

house2017.05.07LR-9.jpg

house2017.05.07ip - 10.jpg
graceful first step

Some of the floor on the landing doesn’t quite meet up with the oak. It is extremely difficult to foresee these join details in planning the house, and lots of these things will emerge in the coming weeks as we race towards the finish line. So today’s decision was to choose a wood detail to act as a mini-skirting. We could have a full-height skirting just like the rest of the house. Or, we could fit a cut-down bit of architrave of the same profile as the rest of the house, or even a tiny bull-nose piece of oak that joins the floor and the beam. Since the structural oak remains the most substantial feature of the build, and the goal is to expose as much of it as possible, we’ve gone ahead and chosen the bull-nose, but as low as possible so we don’t have to chop the dowels, and as thin as possible so it doesn’t look silly.

house2017.05.07ip - 7.jpg

More site meetings, more baking. Ben’s been very patient with us over the time it takes to make these little decisions. Hopefully by the end of the project we’ll get the process dialled and each one won’t take so long. But for now, seeing bits and pieces in situ helps a lot, and sometimes this means climbing up ladders and holding bits of wood up to see how they look!

house2017.05.07ip - 2.jpg
keeping the troops going on cake at a time
house2017.05.07ip - 3.jpg
the things you do for clients, Ben

We finally bit the bullet and removed the oak collar on the clad sections in the master bedroom. Hands in the air, we fully admit to being over-enthusiastic with Neil when we designed the piece. Although the king-post and curved webs were awesomely built, and Terry, Josh and James spent a week installing it, we felt adding them was a decision made in haste so we asked them to take it down. I’m more than a little embarrassed about this decision, but it had to be done. Now it feels like we can breathe in the room.

The guys initially thought they’d have to take down a load of plasterboard and really fight with the screws that held the cladding to the oak. But in the end, they managed to cut the insulation and plasterboard in a nice straight line along some temporary battens put up temporarily alongside the cladding, and the oak was drilled out with a minimum of destruction. Very impressive. We now have to hang fire until Neil can manufacture the new cladding and get it to site. This stuff will be slightly thicker so it meets in the middle thereby covering up the central steel beam.

house2017.05.07LR-1.jpg
… and we can finally breathe again


house2017.05.07ip - 8.jpg
makings of a really nice bird house from the old oak beams

The sun is swinging around towards the front of the house during the day, and it belts in through the front bay in the afternoons making all sorts of lovely shadows and lines.

house2017.05.07LR-2.jpg

The bathrooms are getting tiled and painted, and the bedrooms are getting their dressing of trim in the skirting and wardrobes.

house2017.05.07LR-4.jpg

house2017.05.07LR-3.jpg

house2017.05.07LR-5.jpg

house2017.05.07LR-6.jpg

house2017.05.07LR-7.jpg

house2017.05.07LR-8.jpg

Next week will see the groundworkers returning. They’ll start on the patio around the back, and they’ll swing up to the side of the house before they hit the front. Then it’s the all-important bridges. Tony the structural engineer is putting the finishing touches on the design before issuing instructions to Tim and his team. The goal at the moment is to devote resources to the interior as much as possible and leave the drive until last.

Tim had the club tiles moved up another rung this week. It’s a tiny little detail, and it took a lot of effort to move everything up just one course, but we’re very grateful and it looks great–thanks, Tim!

house2017.05.07LR-13.jpg
front of the house
house2017.05.07LR-14.jpg
back of the house in the sun

house2017.05.07LR-15.jpg

We finished the week with a trip to Rye to visit Nick and see how the painting is coming on. He’s so accommodating and patient with our numpty questions, making us cups of tea, even talking about Gillian about her GCSE final piece and taking us for a tour of Rye Creative. It’s lovely to see the painting again and to have a little bit of input into the work. Gillian and Matt joined us, and after a lovely lunch at The Globe, we spent the afternoon wandering around Rye Harbour, dodging waves, looking for jellies and doing a spot of geocaching. The weather closed in near the end, and it was great to finally see Rye in a bit of sun for a while as in all the previous times I’ve been down there, I’ve been treated to a bit of horizontal rain and lashing gales.

house2017.05.07LR-1-2.jpg
creating some new ideas
house2017.05.07LR-2-2.jpg
tools of the trade
house2017.05.07LR-11-2.jpg
big beach
house2017.05.07LR-5-2.jpg
how do you work this thing again?


house2017.05.07LR-4-2.jpg
Rye wall

Week 54

The roofers came back to relocate the club tiles and the whole tile hanging face is almost there. There are six rows above the club tiles and six rows below, but it still seems a little low, so I think they’ll be back. house 2017.04.26 week 54 - 1.jpg

And I haven’t taken a photo of the front door for a while, so just to remember what it looks like, here’s an image out of the winter shadow an in the sun now that spring is here.

house 2017.04.26 week 54 - 5.jpg

Other parts of the exterior of the building are coming along too. The nice weather helps to make the site look good, and the guys are doing a great job of keeping everything tidy. And when they’re in the middle of a job, most of the bits and pieces are kept together and out of other trades’ ways. It’s amusing to see little empires of woodwork, electrical bits, decorating, and piping in different rooms.

house 2017.04.26 week 54 - 8.jpg
artsy wheelbarrows
house 2017.04.26 week 54 - 9.jpg
electrical detritus in the front porch
house 2017.04.26 week 54 - 12.jpg
panels are coming on

The roofers finished the scalloping on the back windows. They’ve only got the garage flat roof and the club tiles to go.

house 2017.04.26 week 54 - 24.jpg
sunny scalloping on the back of the house

The garage door arrived–hooray! The installers were super jolly and put the thing up in a day. There was a massive design moment at the beginning of the project when we had to decide if to make the door high and bespoke as it is, or to make it a standard size with a brick soldier course on top. The higher door keeps the top in line with the tops of the windows along the face, but it was the expensive option, and I hope that you agree that it makes sense to spend the extra cash on the extra height.

house 2017.04.26 week 54 - 25.jpg
door arrival
house 2017.04.26 week 54 - 6.jpg
door installed

The plumbing team has been quietly getting on with the boiler and fittings all without any fuss whatsoever. It’s funny to come to site, say good morning to Sid who’s mostly been doing this final bit, and for him to get right down to business with a fast-paced “Now, where do you want this exterior tap?” These guys don’t hang around! But you can see that the services are all ready to go in a happy configuration of geometry.

house 2017.04.26 week 54 - 7.jpg
boiler arrangement
house 2017.04.26 week 54 - 15.jpg
tap located on the garage wall

The Sparks have been working hard on the trunking while the other trades are busy in other rooms. They’d rather be cutting out holes for LED down-lights, but this needs doing as well, so now the cables are set in trunking within the coats cupboard. How we finish this area is up for grabs as it’s not plastered. But trunking and plaster don’t usually mix and the whole wall will be painted to seal in the dust, then boxed in to finish it off.

house 2017.04.26 week 54 - 21.jpg
trunking

The kitchen arrived at the appointed hour without fanfare; just a couple of guys who quietly discovered that there was no trolley packed in with the kitchen units. The only solution was to carry each unit by hand, so Artur simply slung them on his back and carried them in. It turned out that he was in charge of fitting the units and most of the appliances as well in the coming week.

house 2017.04.26 week 54 - 13.jpg
that’s the kitchen in there
house 2017.04.26 week 54 - 14.jpg
bit of rubble doesn’t get in the way
house 2017.04.26 week 54 - 10.jpg
before the kitchen arrives
house 2017.04.26 week 54 - 16.jpg
the contents of the truck land in the kitchen space
house 2017.04.26 week 54 - 26.jpg
appliances and more kitchen units

Eventually Artur fitted the whole thing single-handedly. I’ve never had a kitchen this nice and it’s a real luxury. Or hopefully it will be if we made the right decisions. I said to Dave onsite this week that when asked if I was excited about all this recent action that a very large part of me doesn’t want to look at it while it’s being installed in case I change my mind or don’t like some part of the design. But the other part of me is jumping up and down inside and really excited about running the family from this little area.

Some bits like the humungous drawers make it feel really usable and very real. I recall Auntie Eileen saying she really hoped that I’d make a good go of the kitchen when we finally got round to doing the house. That was a very kind thought and I hope she would approve of this incarnation.

house 2017.04.26 week 54 - 2.jpg
magic drawers
house 2017.04.26 week 54 - 3.jpg
three days of work and it’s almost all in — amazing

We knew that the overhang on the peninsula was going to be tight with regard to the big dining table in the room, but it’s only now that the units are in that we can line up a mock table to get a feel for the size. One of the things yet to do is site the pendant and LED spots over it. This isn’t easy and requires a fair degree of commitment on table location. We haven’t quite decided where the lights should be, but one thing is for sure: the overhang and the table together don’t provide enough space to get around comfortably, so the overhang will have to go. That means my two bar stools will go too.

house 2017.04.26 week 54 - 4.jpg
burlap mock table

Part of the ironmongery order arrived last week and was installed while we were away. It’s nice to go around and be surprised by the existence of doors. Sometimes it’s the boundaries that make the space feel like well-defined areas. One nice touch was a set of parliament hinges on the family room doubles.

house 2017.04.26 week 54 - 11.jpg
that’a nice hinge

The shower trays went in while we were away too. We wanted the master ensuite tray to be 100 mm bigger than the well was built for, and this was always going to be a problem with the underfloor heating. The idea was to chip out enough of the concrete floor to accommodate the tray while avoiding puncturing the heating tubing set in the concrete. This was a tricky job that James wasn’t too keen on doing. I wouldn’t be keen on it either; I recall the words “catastrophic” and “potential” and “failure” being used in discussions about this bit. But it was done, and done very well as usual, and the trays are all in sitting in their seals of silicon.

house 2017.04.26 week 54 - 22.jpg
shower tray

The decorators started with the Marble White in the bedrooms, and the skirting went in.

house 2017.04.26 week 54 - 23.jpg
white on white in Bed 05

The stairs arrived as well.

house 2017.04.26 week 54 - 17.jpg
newells
house 2017.04.26 week 54 - 18.jpg
bottom treads
house 2017.04.26 week 54 - 19.jpg
CNC’d area to fit treads…
house 2017.04.26 week 54 - 20.jpg
… and the bit that fits into it

Lots of decisions behind the scenes, and we’re not keeping up with the pace. The pressure is on and everyone can see the horizon now!

Week 51

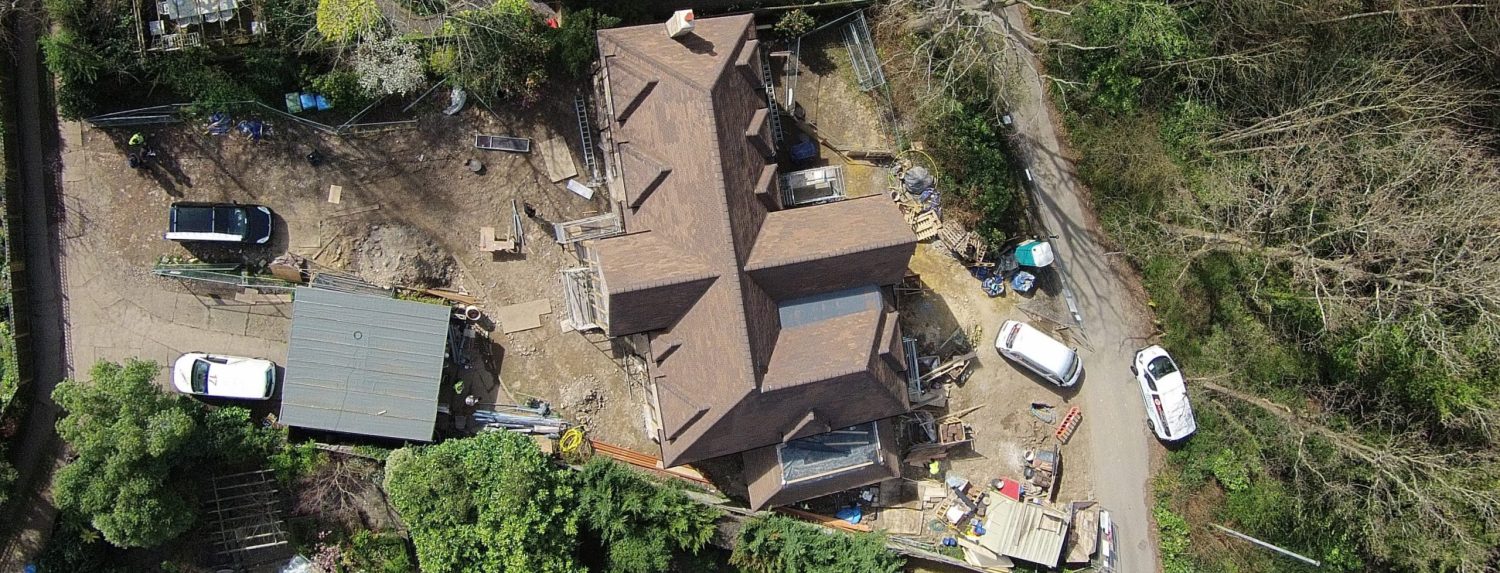
Ben had the drone out and it’s great to finally see the roof in its glory. Here’s a visual progress report from the get go.

And these….

DJI00165 - Copy.JPG

DCIM100MEDIA

Tony had the fire on early in the week, so he kindly invited Ben and me to have a look at making balusters. Each of these is completely hand made by drawing out the bar to a point, then curling it very carefully to match the test piece precisely. Incredible work and much labour involved. Tony has Dave in to do the hammering and finishing, and anyone with eyes can see that their years of working together on projects like this make it seem so easy, but in fact it’s a lot of unspoken expertise involved to make each baluster. There are a lucky-13 curlicues that are framed by straight ones going either up or down. Should be amazing to see when it’s done.

The joinery company making the stairs have been brilliant in supplying Tony with scale drawings of each piece. Colin has travelled from Andover to Betchworth (more than once!) to deliver the drawings and talk about the work with Tony so that the joined up staircase between the two completely disparate trades are installed seamlessly at the end of April. Can’t wait!

house 2017.04.02-1.jpg
Tony and Dave working to draw the bar into a point

house 2017.04.02-4.jpg
checking the curve by eye
house 2017.04.02-13.jpg
bending vice

house 2017.04.02-15.jpg
forest of balusters
house 2017.04.02 - 13.jpg
a proper working forge
house 2017.04.02 - 14.jpg
sorry, can’t stop taking photos of these

Meanwhile onsite, the wood floor arrived. Usually, they hoist the planks up box by box, but the ceilings are a little high for that here, so they were hoisted up two planks at a time–it took a while.

First the guys prime the floor, then they lay a layer of latex which acts as a barrier between the concrete floor and the wood. They mix this bucket by bucket onsite. Then a really thin membrane of foam is cut to shape, and finally the floor is put on top.

house 2017.04.02a - 1 (1).jpg

house 2017.04.02 - 7.jpg
the wood arrived, hooray!
house 2017.04.02 - 8.jpg
primer coat
house 2017.04.02 - 1.jpg
latex milk
house 2017.04.02 - 11.jpg
mixing gear
house 2017.04.02 - 2.jpg
pouring latex on a primed section of floor
house 2017.04.02 - 3.jpg
spreading around by hand
house 2017.04.02 - 6.jpg
Gillian’s room with the finished floor

The services are being installed gradually. We’re waiting on the water board to come and inspect its trench, so although James doesn’t like leaving it open for health-and-safety, it has to be left until they drop round. The boiler should arrive soon; the flooring guys need it so some heat can get into the floor to dry it out. So we were very pleased to see the gas company arrive and install the meter in the hedgehog box around the side of the house. After the drama of last week’s engineer unable to install, this took a grand total of 10 minutes and the guy was off. And the three-phase upgrade for the electrics will be in the middle of April.

house 2017.04.02 - 4.jpg
not a hedgehog
house 2017.04.02 - 17.jpg
ready for electrics

The Sparks are in cutting holes in the ceiling. There is so much to this electricity piece, and we haven’t even chosen any fancy fittings yet. Here’s a challenge for you: next time you’re in a place with small LED ceiling lights, go ahead and have a look at the geometry of their placement. The glossy mags always say to hire a light designer because you yourself as a layperson could never hope to achieve a good effect: what you’re lighting, how you’re lighting, when you’re lighting, controls….. The Sparks want things in grids, as do the architects. We’ve opted for a DIY approach to tweaking Dave’s placements just a little in order to centralise some of the fittings around architectural features like doorways and cupboards. I’m no expert at this, and I hope that I will remember fondly this m.o. when I’m not too upset at the finished product but instead, basking in the glow of the thousands of pounds saved that I didn’t pay to the lighting designer. (Fingers crossed, obvs.)

The guys use their laser sights and chalk lines to get the rows straight. This doesn’t please the decorators who then have to wash off the chalk because the dye runs into the paint, especially if the paint is white. Like on a ceiling. Where the lights are. Duh.

house 2017.04.02 - 18.jpg
takes a day to set out
house 2017.04.02 - 5.jpg
and another couple to drill

The non-herringbone panels on the side of the house are coming together. I had a total 4 am brain-fade about the side panels which are not at 90 degrees, but rather are offset and parallel to each other. I texted James about it suspecting they’d have to rip off the half-laid panel, but he replied with a photo of the plans which clearly show the bricks in parallel. Glad someone’s on the case! And note to self: consult the plans before hitting the panic button.

house 2017.04.02 - 19.jpg
brick slips

But there are still a bunch of gaps in the design. The biggest one is the fireplace, and Steve came up from deepest Sussex again to speak with Dave and me about how to accomplish what we’re after for the surround. We’ve made it enormously complicated, and probably unfeasible from an engineering point of view. We’d like a floating stone mantle–but how to fix it? Lots of head scratching, and to be honest I’m about to give in to a simpler design. This room was never designed to live in, mostly to look at, and this is disappointing as we should have thought about it more from the start. The windows are too close to the fireplace wall to put units in, and the building regulations put so many restrictions on measuring out non-combustible zones that it’s all very tiresome. We’re at that last 20% that takes 80% of the effort. But it will be beautiful, the workmanship is great, and it’s only complicated because we the clients are trying to squeeze too much in. Much better to simplify, pare back and let the features in the room breathe a bit. Watch this space.

house 2017.04.02 - 9.jpg
blank wall, blank heads

Another bug-bear is the garage roof. The guys have done a brilliant job at getting the end to just kiss the fence, so the dimensions are perfect. But how to support it is another kettle of fish. The original (built, then unbuilt) brick pier was a thing of beauty, but it didn’t give us very much room to get around. So we’ve opted for an oak post on a smaller plinth instead. In the meantime, there is a slightly bendy Accro holding the roof up at the spot where Terry says holds the max load. But this still leaves us a little short on space to get around. Do we place the final post off the sweet spot either towards the building or away from it and add a stiffening bracket? Can we? Or do we suck it up and just stick a post in?

house 2017.04.02 - 10.jpg
jury is out on replacement to bendy Accro

Last week’s tile-hanging design query was bottomed out, but this ended up being just a case of making sure everyone was looking at the same revision. The flare at the bottom will be great, and the roofers will fit in the tile hanging when they next have a gap in their diary. It’s a stand alone piece, and not mission critical–which is refreshing!

house 2017.04.02 - 16.jpg
flare supports


Week 47

We have a flue!

house 2017.03.05 - 1.jpg
no jolly men in red suits today

Actually, it’s a flue liner, not to be confused with the identically named but made of pumice ‘flue liner’ that was already installed with the chimney went up. All very technical, but for the past few weeks, Dave has been developing the plans to make this thing work.

Screen Shot 2017-02-28 at 15.57.22.png
These are the best laid ones of the bunch…
house 2017.03.05 - 2.jpg
installing the cowel at the top
house 2017.03.05 - 6.jpg
all set to go

Terry and Josh have made a start on the garage roof. This first requires brackets to be attached to the wall on one side and onto the brickwork on the other. They were making good headway until they got called to build a new skin to a wall in the hallway later in the week.The problem was a very small area of single skin which was going to make the place thermally inefficient and vulnerable. This issue had been brewing for a while as we’d been waiting for approval from the warranty company with this wall design and with a little pushing from Ben, they finally approved the thinnest version which is great because it allows more of the oak frame to be exposed. But it’s a problem no longer, as the thing is now built at long last, and the plasterers can get on and finish it off.

house 2017.03.05 - 1 (1).jpg
Terry’s garage roof brackets
house 2017.03.05 - 17.jpg
thicker wall

Aaron’s been in to finish the first fix wiring. The wires have been capped and cased all over the house, and they’re making maps of were they are under the plaster so we don’t end up sticking nails through them when we put up artwork.

house 2017.03.05 - 3.jpg
breaking a few eggs before the omelette is finished

Once Aaron was done, there was a whole gang of new plasterers that came and put the ceilings up. It’s very high tech with laser sights and grids of brackets to hold up the suspended ceiling that hides the electrics and plumbing under the concrete upstairs floor. They’ll still be about 2.8 m off the deck.

house 2017.03.05 - 4.jpg
straight line gizmo

One last trip around the scaffold to check out the finished roof.

house 2017.03.05 - 5.jpg
can’t resist taking another of these pix
house 2017.03.05 - 11.jpg
cloaking tiles
house 2017.03.05 - 10.jpg
a mortar snake through a hole in the slate (these just flick off)

house 2017.03.05 - 7.jpg

house 2017.03.05 - 8.jpg
lead dormer cheeks
house 2017.03.05 - 9.jpg
pencil lines showing the handmade workmanship

The doors arrived at long last. It took four guys to lift them off the truck, and they came pre-assembled in their frames. James, Terry and Josh will fit them next week which will make the building will be almost air tight. This will not be a small undertaking. As you can see, we have yet to choose a doorknob in the centre. Clinton actually bought a brass casting kit a couple of years ago, and we’ve got some thoughts, but it’s got to be good. No pressure!

house 2017.03.05 - 12.jpg
colossal front door (it’s upsidedown)

The plasterers are just about done upstairs and will move downstairs next week. Like the rest of the house, it’s not been straightforward: there are some fiddly bits like in the upstairs hallway and some enormous swathes like the stairs wall and the whole of our bedroom. They’ve done a great job, but they’ve got to get a wriggle on to finish downstairs before the floor goes down.

house2018.03.05-4.jpg
master ceiling
house2018.03.05-5.jpg
plaster in the master bedroom
house2018.03.05-8.jpg
hallway looking east


house 2017.03.05 - 16.jpg
hallway looking west
house2018.03.05-9.jpg
stairs area
house 2017.03.05 - 14.jpg
lunch pail

And then the scaffolding came down….

house2018.03.05-1.jpg

house2018.03.05-2.jpg

house2018.03.05-3.jpg

house2018.03.05-7.jpg

house2018.03.05-6.jpg
a good before picture of the knot garden


Week 44


house2017.02.11 - 22.jpg
James and Spencer discussing the roof

The roof is almost finished. Spencer asked me if I was happy with the course of cloaking tiles that will sit between the oak gables below and the roof tiles above. He’s added a layer of Welsh slate secured underneath to prevent the roof from wobbling as the oak settles. They’ll be mortared in when they’re laid next week, and the gap between them and the roof tiles will be filled as well. The carefully installed leadwork finishes the job.

house2017.02.11 - 18.jpg
junction of tiles, slate, cloaking, and lead
house2017.02.11 - 19.jpg
cloaking mockup that will go up and up
house2017.02.11 - 20.jpg
leadwork
house2017.02.11 - 21.jpg
clothed and unclothed

The gutters went up later in the week. They’re powder coated aluminium which will last and last with any luck. Aluminium is made in longer lengths than cast iron which is great for the long runs without dormers–easier to make, easier to coat, and easier to install. Although the guy I spoke to who was working with long sections of it up on the scaffold late on Friday said it was very very cold as a material to handle. Yes, at 2C it would be. They’ve installed around all the fiddly dormers, and the downpipes will go in when the scaffolding is down. In the meantime, they attach giant bags to where the downpipes should be, so that water still collects and stays off the face of the building until the job is complete.

house2017.02.11 - 9.jpg
dormers with burlap hats on
house2017.02.11 - 10.jpg
long runs of guttering on the east side
house2017.02.11 - 11.jpg
pieces cut to length and ready for fitting


house2017.02.11 - 12.jpg

house2017.02.11 - 13.jpg
guttering installed just in time–this is slushy snow in standstill traffic…lovely!

It’s the middle of a bitter cold spell with snow off and on all week, but none of it sticking, so it’s just disgusting outside with no snow-joy. Phil the plasterer says that they need it to be 5 degrees and rising for plaster to set. Part of their job is to physically stand there and watch it set to even out imperfections, so this is taking rather a while, more like days than hours, it being all in cold and slo-mo.

There are ten individual 2.5 m tall panes of glass in the hallway at the front of the house. If we do decide to go with the fancy automated curtains we’ve got in mind, we’ll need holes drilled and wires for power setup through them. James had the unenviable task of drilling the structural oak as close as he could to the windows given the body of the drill. So faced with this tricky job of messing around with the expensive and carefully engineered oak, he simply bought a new drill bit for the job, lined it up, and with his typical levels of cool, just got on with it. It looks bizarre to see shavings of precious structural oak now adorning the surfaces of the lower beams. I’m glad I wasn’t there to watch.

house2017.02.11 - 15.jpg

house2017.02.11 - 16.jpg
cable hole

The back of the house is looking more like a house. Terry is still up the top, round the sides, inside, outside, and up and down ladders all day long cutting bits to go just about everywhere. Meanwhile, Josh is in full voice doing the same. There is more than enough to keep both of them very busy and loads of disco tunes to keep them going.

house2017.02.11 - 2.jpg
back of the house

We welcome Nicola on board this week. She’s the garden design expert and will draw up a plan for the front and the back. This is timely because I had the good fortune to meet James the landscape gardener and Andy with the driveway materials, both to discuss what’s happening outside. So a plan is where we want to start, especially with the hard landscaping and tree-planting as there is a certain level of commitment involved in those pieces, and that will come to fruition in the coming weeks. For once we’re doing something in the important-and-NOT-urgent-box, and not in our usual space of important-and-urgent.

Meanwhile, what colour of driveway would you like? The most cost-effective range is the 6mm aggregate which requires a 16mm base rather than the 10mm aggregate which requires a 22 mm base. Less material means less labour as well as less of the stuff in the first place which equates to less money (hopefully).

house2017.02.11 - 1.jpg
10 mm is too big, 3 mm is to small, so 6 mm is just about right

Another visit to the forge to end the week to have a discussion with Tony about some very minor tweaks to the curlicues.

house2017.02.11 - 3.jpg
look closely for snowflakes falling in Betchworth

house2017.02.11 - 4.jpg

We had a good chat about his current job, how he started his career and what happened to allow him to start working in a place like this 27 years ago. I think he is enjoying working on our project as he seems to be a specialist in odd and interesting metalwork staircases. We’ll go back another time when the fire is on and he’s making our pieces.

house2017.02.11 - 5.jpg
the anvil has seen many years of action
house2017.02.11 - 6.jpg
Tony and Clinton discussing the ups and downs pattern

James is preparing to fill in the brick slip panels soon. He’s given one of them a start, but the specialist epoxy mortar we chose back in Week 31  needs a special gun for application rather than a trowel, so he’s waiting on its delivery before continuing. There is leadwork to fill in beforehand anyway. Meanwhile, Clive has been cutting bricks like there’s no tomorrow.

house2017.02.11 - 8.jpg
Clive’s been cutting bricks and tiles

I hope the view through the building will always be this good. Maybe if it’s good now with bags of plaster, ladders, and light fittings hanging off the ceiling, it will be even better when it’s all tricked out with furniture when you come down to make a cup of tea in the morning.

house2017.02.11 - 23.jpg