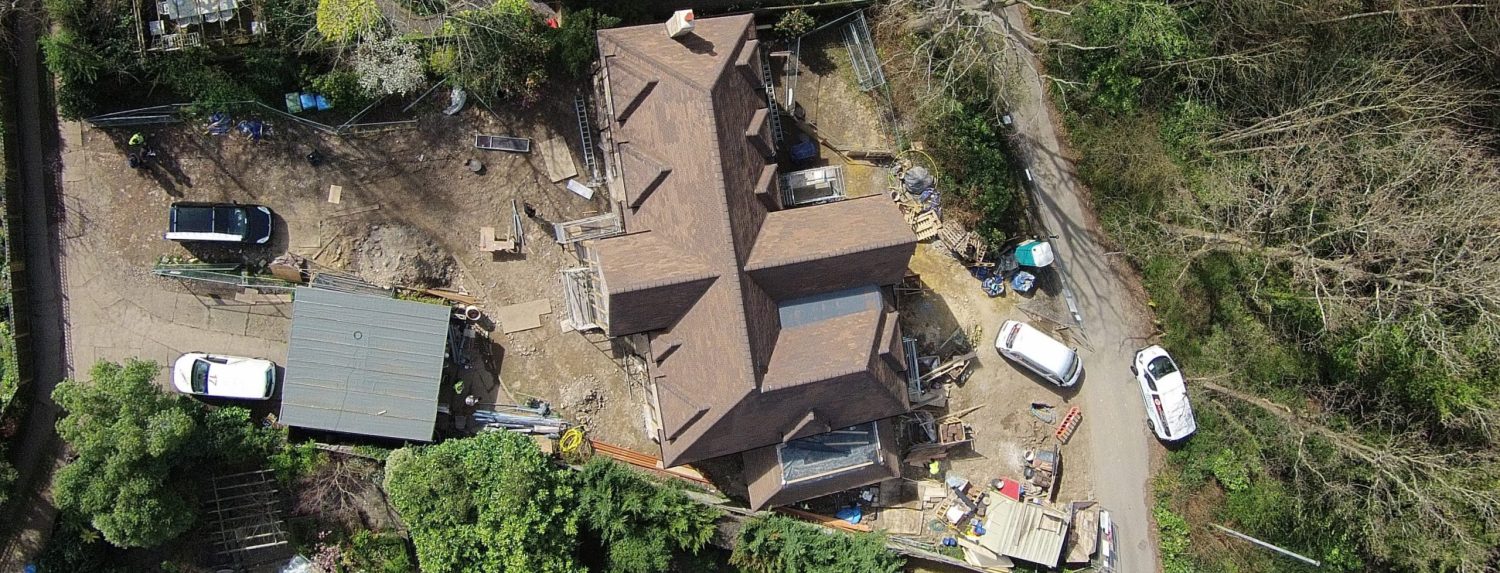
Ben had the drone out and it’s great to finally see the roof in its glory. Here’s a visual progress report from the get go.
And these….


Tony had the fire on early in the week, so he kindly invited Ben and me to have a look at making balusters. Each of these is completely hand made by drawing out the bar to a point, then curling it very carefully to match the test piece precisely. Incredible work and much labour involved. Tony has Dave in to do the hammering and finishing, and anyone with eyes can see that their years of working together on projects like this make it seem so easy, but in fact it’s a lot of unspoken expertise involved to make each baluster. There are a lucky-13 curlicues that are framed by straight ones going either up or down. Should be amazing to see when it’s done.
The joinery company making the stairs have been brilliant in supplying Tony with scale drawings of each piece. Colin has travelled from Andover to Betchworth (more than once!) to deliver the drawings and talk about the work with Tony so that the joined up staircase between the two completely disparate trades are installed seamlessly at the end of April. Can’t wait!


Meanwhile onsite, the wood floor arrived. Usually, they hoist the planks up box by box, but the ceilings are a little high for that here, so they were hoisted up two planks at a time–it took a while.
First the guys prime the floor, then they lay a layer of latex which acts as a barrier between the concrete floor and the wood. They mix this bucket by bucket onsite. Then a really thin membrane of foam is cut to shape, and finally the floor is put on top.


The services are being installed gradually. We’re waiting on the water board to come and inspect its trench, so although James doesn’t like leaving it open for health-and-safety, it has to be left until they drop round. The boiler should arrive soon; the flooring guys need it so some heat can get into the floor to dry it out. So we were very pleased to see the gas company arrive and install the meter in the hedgehog box around the side of the house. After the drama of last week’s engineer unable to install, this took a grand total of 10 minutes and the guy was off. And the three-phase upgrade for the electrics will be in the middle of April.


The Sparks are in cutting holes in the ceiling. There is so much to this electricity piece, and we haven’t even chosen any fancy fittings yet. Here’s a challenge for you: next time you’re in a place with small LED ceiling lights, go ahead and have a look at the geometry of their placement. The glossy mags always say to hire a light designer because you yourself as a layperson could never hope to achieve a good effect: what you’re lighting, how you’re lighting, when you’re lighting, controls….. The Sparks want things in grids, as do the architects. We’ve opted for a DIY approach to tweaking Dave’s placements just a little in order to centralise some of the fittings around architectural features like doorways and cupboards. I’m no expert at this, and I hope that I will remember fondly this m.o. when I’m not too upset at the finished product but instead, basking in the glow of the thousands of pounds saved that I didn’t pay to the lighting designer. (Fingers crossed, obvs.)
The guys use their laser sights and chalk lines to get the rows straight. This doesn’t please the decorators who then have to wash off the chalk because the dye runs into the paint, especially if the paint is white. Like on a ceiling. Where the lights are. Duh.


The non-herringbone panels on the side of the house are coming together. I had a total 4 am brain-fade about the side panels which are not at 90 degrees, but rather are offset and parallel to each other. I texted James about it suspecting they’d have to rip off the half-laid panel, but he replied with a photo of the plans which clearly show the bricks in parallel. Glad someone’s on the case! And note to self: consult the plans before hitting the panic button.

But there are still a bunch of gaps in the design. The biggest one is the fireplace, and Steve came up from deepest Sussex again to speak with Dave and me about how to accomplish what we’re after for the surround. We’ve made it enormously complicated, and probably unfeasible from an engineering point of view. We’d like a floating stone mantle–but how to fix it? Lots of head scratching, and to be honest I’m about to give in to a simpler design. This room was never designed to live in, mostly to look at, and this is disappointing as we should have thought about it more from the start. The windows are too close to the fireplace wall to put units in, and the building regulations put so many restrictions on measuring out non-combustible zones that it’s all very tiresome. We’re at that last 20% that takes 80% of the effort. But it will be beautiful, the workmanship is great, and it’s only complicated because we the clients are trying to squeeze too much in. Much better to simplify, pare back and let the features in the room breathe a bit. Watch this space.

Another bug-bear is the garage roof. The guys have done a brilliant job at getting the end to just kiss the fence, so the dimensions are perfect. But how to support it is another kettle of fish. The original (built, then unbuilt) brick pier was a thing of beauty, but it didn’t give us very much room to get around. So we’ve opted for an oak post on a smaller plinth instead. In the meantime, there is a slightly bendy Accro holding the roof up at the spot where Terry says holds the max load. But this still leaves us a little short on space to get around. Do we place the final post off the sweet spot either towards the building or away from it and add a stiffening bracket? Can we? Or do we suck it up and just stick a post in?

Last week’s tile-hanging design query was bottomed out, but this ended up being just a case of making sure everyone was looking at the same revision. The flare at the bottom will be great, and the roofers will fit in the tile hanging when they next have a gap in their diary. It’s a stand alone piece, and not mission critical–which is refreshing!


